How to Backup iphone to Mac,itunes and icloud

Your iPhone, iPad, or iPod Touch probably houses some pretty expensive data, photos, contacts, notes, documents, and more. What would it cost to replace all that data if your iOS device were lost, stolen, severely damaged, or just went kaput? Backing up your iPhone data is important to you to keep your data safe. If you backup iPhone, iPad, or iPod touch, you’ll have a copy of your information to use if your device is ever replaced, lost, or damaged. In order to help you out, here we are providing the ways to “ How to bakup iphone to itunes and icloud “.

Most of the people backup iphone to Macbook. Apple gives you two very simple and free ways for duplicating and storing a copy of your information. One option is to use iCloud and the other is to use iTunes. iCloud is cloud storage that which gives you the ability to sync between multiple iOS devices and your Mac. iTunes is usually a hassle when it comes to transfering music and pictures. However, backing up your iOS devices on iTunes is very simple and takes just a few clicks.

Choose a backup method

Before you get started, you have to know the difference between making backup iphone with iCloud and iTunes. Decide which method is best for you and follow the steps below. In case you ever need an alternative backup, you can make one in iCloud and another in iTunes.

How to Backup iphone to itunes and icloud

Backup iphone to iTunes

1. Open iTunes and connect your device to your computer.

2. Save content that you downloaded from the iTunes Store or App Store by clicking File > Devices > Transfer Purchases. If you’re using Windows and you don’t see a File menu, press the Alt key.
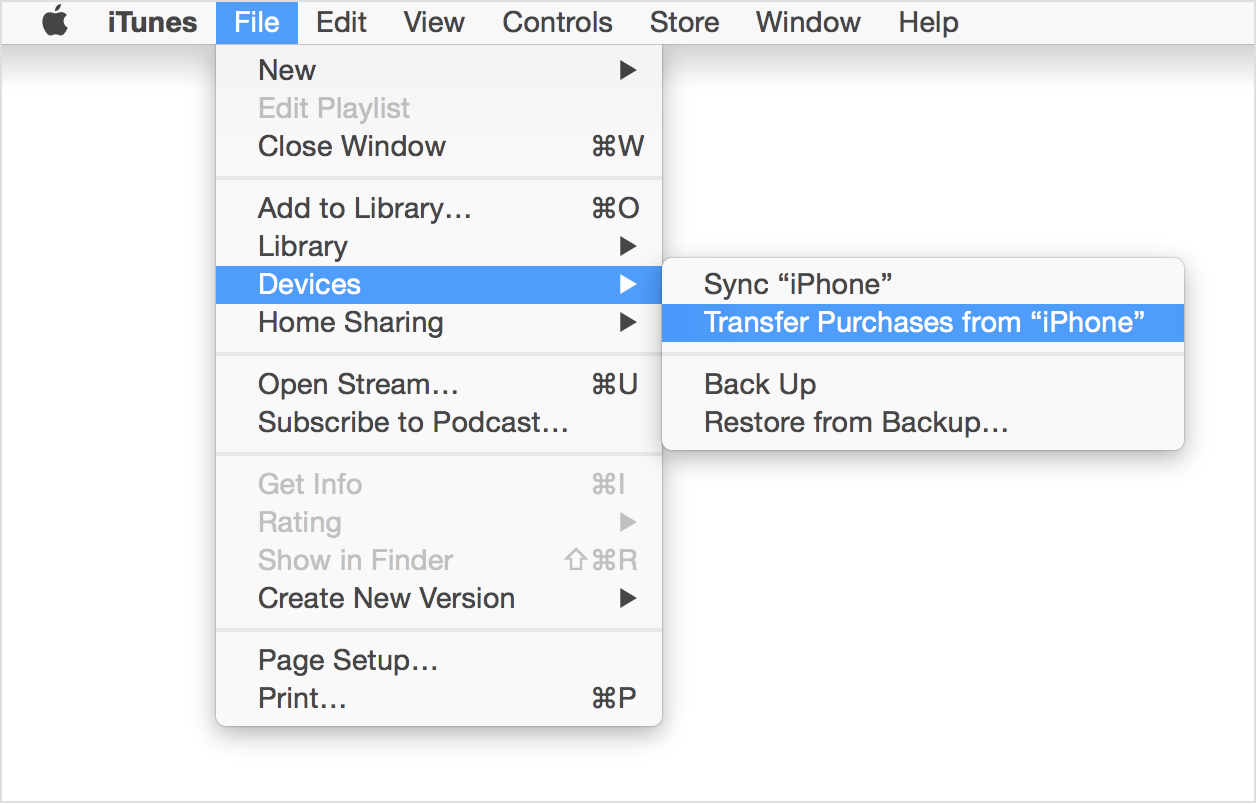
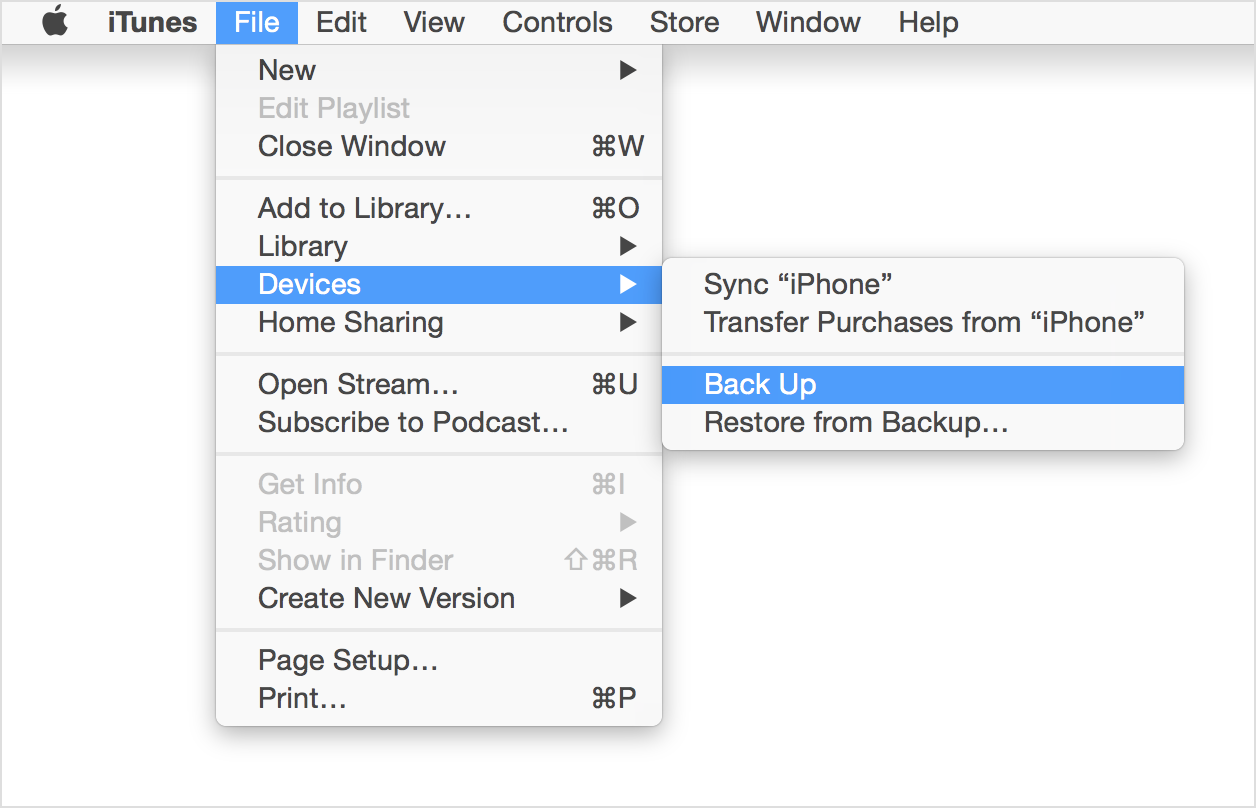
3. Wait for iTunes to finish transferring your purchases. Then, click File > Devices > Back up. If you’re using Windows and you don’t see a File menu, press the Alt key.
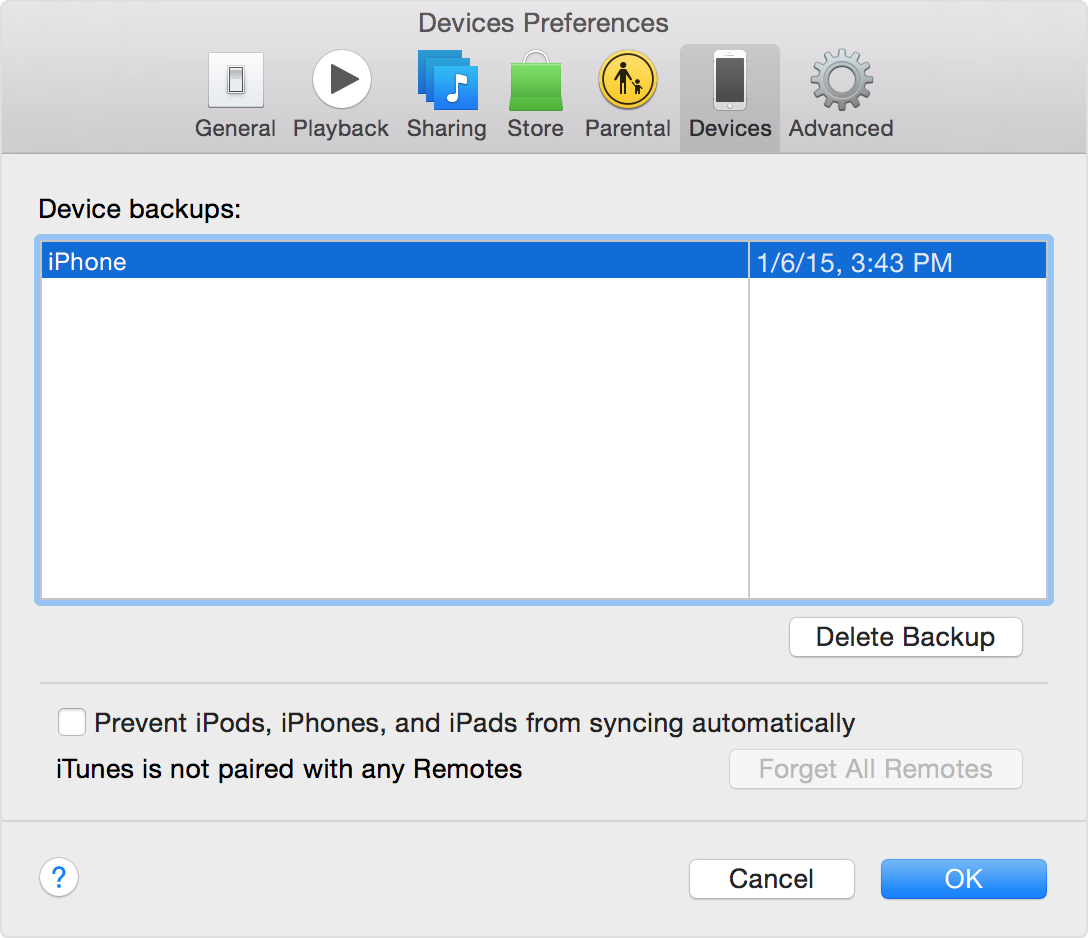
4. After the process ends, you can see if your backup finished successfully by clicking iTunes Preferences > Devices. You should see the name of your device with the date and time that iTunes created the backup.
Also Read : 5 Best iPhone Backup Apps for iOS Users

Backup iphone to iCloud

1. Connect your device to a Wi-Fi network.

2. In iOS 8 or later, tap Settings > iCloud > Backup.
In iOS 7 or earlier, tap Settings > iCloud > Storage & Backup.

3. Make sure that iCloud Backup is turned on.
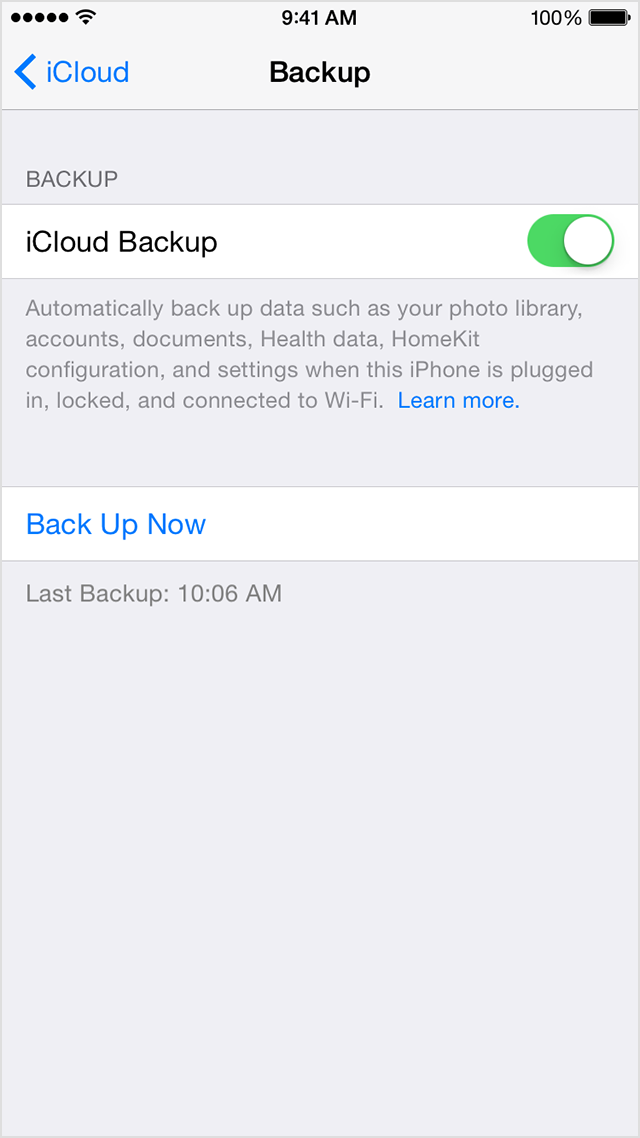
4. Tap Back Up Now. Stay connected to your Wi-Fi network until the process completes.

5. Make sure the backup finished by tapping Settings > iCloud > Storage > Manage Storage, and then select your device. The backup you just made should appear in the details with the time and backup size.

We are sure this article will help you to backup iphone contacts to PC or Gmail. Not only contacts, you can also backup iphone Photos, Notes, Documents…etc to icloud or to macbook.

Also Read : 10 Best iphone Keyboard Apps
How to Backup Android Smartphone easily

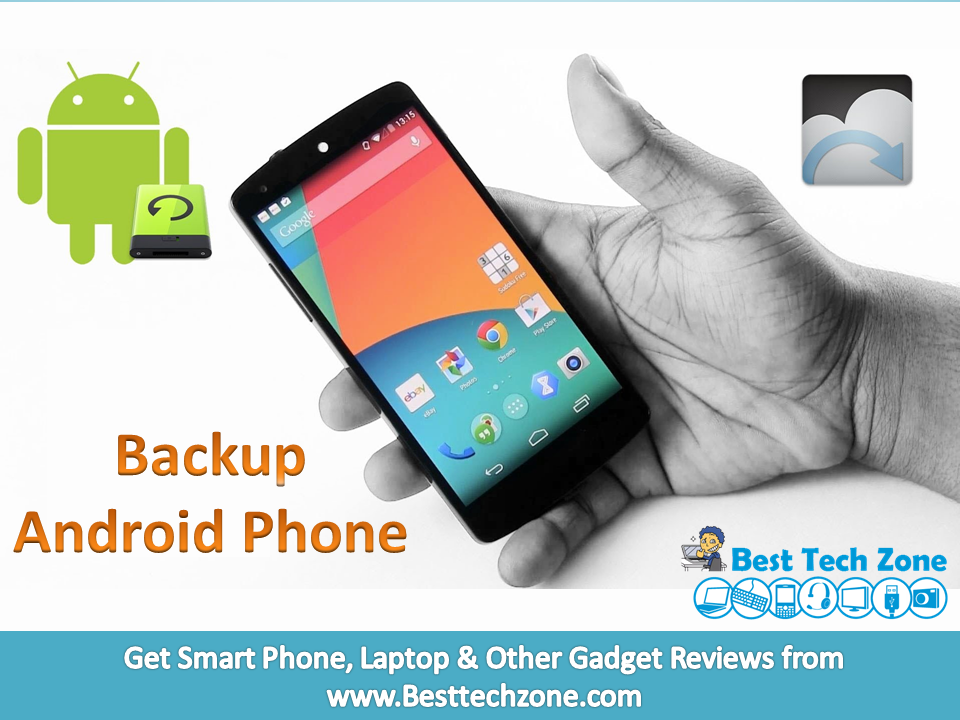
Now a days most of the people are not only using Android smartphones for making and receiving calls and texts but also for storing important personal data. What would be happen? If we loss our android phone. We can’t do anything after losing our Android phones. In order to avoid this problem we should backup Android phone. Don’t worry friends, if you don’t know how to backup Android phone. For the sake of you people, here we are providing the ways to backup Android phone Data, Contacts, messages, Apps to PC.

How to Backup Android Phones

Like Apple, Google automatically backs up a significant portion of user data to the cloud with the user’s permission. To allow this, go to Settings > Backup & Reset, and then tap “Backup My Data” and “Automatic Restore.” From this screen you can also select the Google account to which you’d like to sync your data.

Backup Android Smartphone

The more Google services you use, the more data preserved on Google’s services, even if your phone and computer both die at the same time. Initial backup might take some time, especially if you have large amounts of data saved on your phone, but once the initial data is backed up future syncs will be shorter.

Manual Transfer

You can also manually transfer music, pictures and videos from your Android phone straight to your PC via cable. Windows will mount your phone as an external hard drive, while Mac users will have to download Android FileTransfer first. Remember, if you’re storing your files on your computer, you’ll want to use other backup software as well.

My Backup Pro

Backup Android Smartphone

Download My backup Pro

If Google’s services just aren’t doing it for you, the My Backup Pro app will take care of just about anything you can backup on your phone without rooting it. Photos, app data, browser bookmarks, contacts, system settings, home screen shortcuts, alarms, calendars, MMS messages, SMS messages, music playlists and almost anything else you can customize on your phone can be tucked away in case of an accident. Information can be stored to the SD card (to transfer to a new phone) or to the cloud (in case your phone is stolen), so your data is always readily available.

SMS Backup+

Backup Android Smartphone

Download SMS Backup +

If you’re just concerned with your SMS messages, SMS Backup is a free app that will store your texts to a label in your Gmail account, meaning that they’ll be searchable as well.
we are sure that this article ” How to Backup Android Phone ” will be helpful, in order to keep your data securely.
ALSO SEE


How to create Windows 10 bootable USB Flash Drive

We are all eagerly waiting to experience the Windows 10 operating system. Microsoft already announced that Windows 10 is going to be released on July 29 this year. If you don’t have the possibility to install Windows 10 os with DVD, what will you do? The only option is Installing  Windows 10 in your system with USB Flash drive. Before going to install Windows 10, first you have to do windows 10 bootable usb drive. But now the problem is most of the people may don’t know “How to create Windows 10 bootable USB Flash Drive”. Don’t worry friends, we are always there to help you out. Here we are providing the steps to make  windows 10 bootable usb Flash drive.

Create a Windows 10 Bootable USB Flash Drive

Usually when we cover creating bootable USB drives for Windows, we recommend the Windows 7 USB/DVD Download Tool, but I’ve had some problems creating one and started looking for a different option.

So this time around, I thought I would try the free utility called Rufus. Here’s a look at using it, and in the end, I actually had a faster experience using it than the older Microsoft tool.

First of all, make sure you download the Windows 10 Technical Preview by joining the Windows Insider Program as explained in this article. Also make sure your using a USB that is at least 4 GB for the 32-bit version and 8 GB for the 64-bit version.

One of the first cool things about Rufus is that no installation is necessary, which means you can stick it on a network location, or other external drive to run it. When you run it, setting it up is simple.

Step 1: Visit this page and download the latest version of Rufus. Rufus is a portable utility and hence doesn’t require an installation.

Step 2: Connect your 4GB+ USB drive to your PC where you have installed Vista, Windows 7, Windows 8, or Windows 8.1. Be sure to backup all data from your USB drive.

Step 3: Run Rufus utility. Click Yes button when you see the UAC prompt to launch the tool.

Step 4: Under the Device section, select your USB drive that you want to make bootable, select MBR partition scheme for BIOS or UEFI computers, or GPT partition scheme for UEFI computer depending the type of partition type on your PC.

Windows 10 bootable USB Flash Drive

Step 5: Next, select the File system as FAT32 (default) as it supports both BIOS and UEFI. But if you’re sure that your PC doesn’t support UEFI, you can choose NTFS for a faster installation.

Step 6: Enter a volume label, click on the CD/DVD drive icon to browse to the Windows 10 ISO image file. Select the file.

Step 7: Finally, click Start button, click OK button when you see the warning dialog to continue its job.

Windows 10 bootable USB Flash Drive

Windows 10 bootable USB Flash Drive

Once Rufus completes its job, you’ll see “Done” message. That’s it!

Once done, you can connect bootable USB to the PC on which you want to install Windows 10, change BIOS settings to boot from USB, and start installing Windows 10.

ALSO SEE

Share this article ” How to create Windows 10 bootable USB Flash Drive “with your friends

How to create a Bootable Windows 8.1 USB flash drive

If you want to do a clean install of Windows, you need a bootable installation medium so that the setup can be started up without the need of any other OS. Now if your PC/Laptop does not have a DVD drive, your next available option is to use a Pen Drive/USB Drive as the Windows installation media. The USB Drive also needs to be made bootable, hence mere copy pasting of the installation files won’t help. But most of the people may don’t know “How to create a Bootable Windows 8.1 USB flash drive”. Don’t worry friends for the sake of you people, here we are providing the steps to make bootable windows 8.1 usb drive.

Create a Bootable Windows 8.1 USB flash drive

There are many tutorials on the web, majority of which make use of the Windows 7 USB DVD Download Tool, but many users faced issues with it while creating Windows 8.1 installation media. So, we will use a better tool called Zotac WinUSB Maker which is free and works for Windows Vista, 7, 8 and 8.1.

Before proceeding, arrange the following:

  1. A Windows ISO file or Windows DVD on your system.
  2. A USB Flash Drive having a capacity of 4GB or higher.
  3. Download Zotac WinUSB Maker from the official website here

Procedure

  1. Connect your USB Drive to the PC.
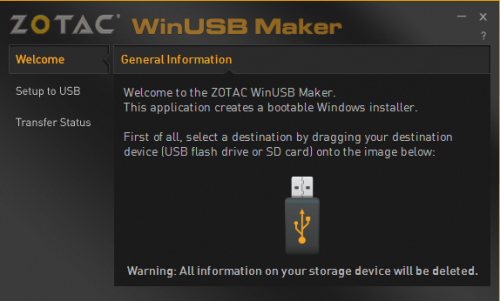
  2. Open ZOTAC WinUSB Maker.Bootable Windows 8.1 USB flash drive
  3. Open My Computer/This PC and Drag> Drop your USB Drive into the WinUSB Maker window.
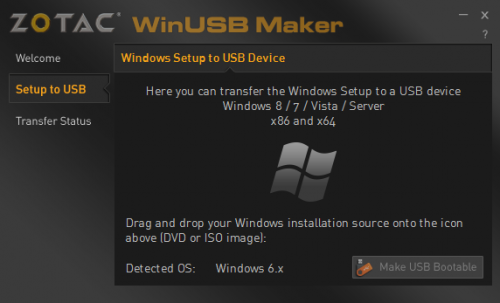
  4. Browse to the location where you have saved the Windows 8.1 ISO and Drag> Drop it into the WinUSB Maker window. You can also drop the DVD Drive if you want to create the USB Installer from a DVD.
  5. The OS will be detected from the ISo and WinUSB maker will make the required changes to settings automatically. OS is shown according their NT Kernel.
  6. Click on Make USB Bootable and wait up for the program to transfer the files to the USB Drive.Bootable Windows 8.1 USB flash drive
  7. Plug in the USB Drive to the PC on which you want to install Windows and make sure BIOS is set to boot fist from USB Drive. Install Windows as you normally do.
Also See

How To Install Windows 8.1 From USB Flash Drive

Are you surfing for “How To Install Windows 8.1 From USB Flash Drive?”. Then you have landed at the right place. Here we are providing the steps to install Windows 8.1 from USB Pen drive.

Now a days most of the people are using USB Flash drives rather than DVDs. Installing Windows in the tablets that do not have optical drives from the setup DVD becomes a problem. We can overcome this problem, by installing windows from USB Flash drives. Not only in tablets, but also  you can install windows 8.1 in PCs with the help of USB Pen drives.

Windows 8.1 is new upgraded version of windows 8 and think this is awesome. New windows have lots of new features like new app store, new start menu also multiple tasking windows.

Before going to install windows 8.1 in your Pc from USB Flash drive, you have to make a Bootable Windows 8.1 USB flash drive. Then only it is possible to install Windows 8.1 from USB Flash drive.

Click Here for How to create a Bootable Windows 8.1 USB flash drive

How To Install Windows 8.1 From USB Flash Drive

1. First of all Insert you pan drive in pc.

2. Now restart your pc and boot from USB.

3. After its automatically boot.

4. Now windows setup wizard appears now hit on Next button and after it click on“Install”.

Install Windows 8.1 From USB Flash Drive

Install Windows 8.1 From USB Flash Drive

5. Now accept the license and Hit Next.

Install Windows 8.1 From USB Flash Drive

6. Select “custom: Install windows only (advance)” option.

Install Windows 8.1 From USB Flash Drive

7. Now select your partition where you want to install windows. Just Format it and then select it and hit next.

Install Windows 8.1 From USB Flash Drive

8. After it. Setup will be taking 10 to 15 minutes for processing.

9. After completing the process Pc automatically restarted. Now windows getting started and installing drivers for your pc and its take 3-5 minutes.

10. Now personalize option appears. Now select theme color of your windows. Also enter your PC Name and Hit next button.

Install Windows 8.1 From USB Flash Drive

11. Click on “use express settings”.

Install Windows 8.1 From USB Flash Drive

12. Now it’s asking for Microsoft account. If you have Microsoft account then enter your email and password. If you haven’t account then click on “create a new account” and click next.

Install Windows 8.1 From USB Flash Drive

13. Now enter your verification which Microsoft sending you on mobile.

After doing all that your windows installing is completed. Now one more thing you have to do is activate your product.

ALSO SEE

How to Light Up Apple Logo of Your iPhone Like a MacBook

Have you ever seen Macbook laptops? Apple logo on the top of macbook lights up when they are in use. Have you ever think that why doesn’t Light up Apple logo on iphone 5 or iphone 4. Why don’t we add that same feature to the apple logo on the back of your iphone? It would be nice to have the light up Apple logo on the back of our iPhones.

But now the question is “How to Light Up Apple Logo of iPhone Like a MacBook?”. For you people here we providing the step-by-step process for How to Light Up Apple Logo of iPhone.

How to Light Up Apple Logo of iPhone Like a MacBook

1. Before You Begin

1. In order to do this first you have to purchase a light kit. *Make sure to select the one for your correct model of iPhone, and that you are select the V2 version of the kit.

2. This will void your warranty (simply because they can tell you opened your iPhone because of the dye that is on the screws at the bottom and that voids the warranty).

2. Open the iPhone

1. Unscrew the two tiny screws at the bottom of the iPhone and make sure to set them aside by themselves (do this because all the screws you’ll be removing are different sizes and so we want to make sure we put the right ones back in the right places).

2. Slide up on the back panel, until it moves up slightly.

3. Remove the back panel.

Light Up Apple Logo of iPhone

3. Install the Light Panel

1. Remove 5 screws holding the EMI shield in place and make sure to set them aside by themselves (do this because all the screws you’ll be removing are different sizes and so we want to make sure we put the right ones back in the right places).

2. Gently lift up the connector that gives power to the screen.

3. Remove the Kapton film from the underside of the connector.

4. Attach two pieces of the 3M tape in between the two connectors under where the connector we lifted up was (one on top of the other to give it height).

5. Position the light pad so that the connector of the light pad sits on the two pieces of 3M tape.

6. Put the connector that gives power to the screen back down on top of the connector on the light pad and reconnect it to the two connectors on either side of it.

7. Turn on the phone to check to see if the light pad lights up correctly.

8. Peel the tape off either the white or colored light diffuser and stick it to the inside of the back cover so it covers the Apple logo (the white one will make the apple logo white, the colored one will make it change color depending on angle, up to your personal preference which you choose).

9. Put the back cover over the back of the phone just to test to make sure everything is lined up properly, then put it aside again.

4. Close the iPhone Back Up

1. Replace the 5 screws the held down the EMI shield.

2. Take the rear panel that comes with the kit and slide it back on to the iPhone in the opposite manner you removed the original one.

3. Replace the 2 screws at the bottom of the iPhone.

Also See

How to use Smartphone as Projector

Do you ever want to share a photo, movie, website, or business presentation on big screen?. For this you have to buy a projector in previous days. But now you can turn smartphone into home cinema projector using common household items.

There are pricey attachments available that’ll convert a smartphone into a projector, enabling anyone to physically share whatever they want by flashing it onto a wall, but nobody should have to pay for such a tool when they can fashion a cheap solution for themselves. Here we are providing step-by-step guide on how to use smartphone as projector. It also includes images, directions, advice.

The only tools required for this conversion include: one box (preferably a black box to prevent light diffusion), one magnifying glass, one paper clip, one Stanley knife, Duct tape, and a smartphone, naturally.

How to use Smartphone as Projector

use Smartphone as Projector

use Smartphone as Projector

use Smartphone as Projector

use Smartphone as Projector

use Smartphone as Projector

To rotate a screen on an iPhone, just go under the Accessibility options of Settings. Android users can download Android smartphone projector app like Screen Rotation Control or Ultimate Rotation control. Once you’ve done this, turn your smartphone’s screen brightness up, put it into the box, start fiddling with your smartphone projector until you find a sweet focus point, close the box and dim the lights.

use Smartphone as Projector

use Smartphone as Projector

use Smartphone as Projector

I am sure that you that this article can help you a lot. By following these steps, you can do it yourself, i.e, conversion of Smartphone into projector. With the help of this guide you can use your smartphone as projector with out spending more money.

ALSO SEE