Hey folks, let’s cut to the chase—if you’re here, odds are you’ve been pulling your hair out over drywall corners that just won’t play nice. Regular bead is fine for basic rooms, but when you’ve got custom profiles—think those sharp 1/8” reveal edges, rounded bullnose that’s not stock, or even the angled transition profiles for open-concept great rooms—installing ’em correctly in corners doesn’t have to feel like solving a Rubik’s cube blindfolded. I’ve been supplying Special Custom Drywall Profiles for over 12 years, so I’ve seen every mess from contractors winging it to homeowners panicking because their “quick install” left a corner that cracks before the paint even dries. Today, I’m walking you through the step-by-step that works, no fancy tools required, no vague “trust the process” garbage—just what actually sticks, lasts, and makes that custom corner look like it was built by a pro. Special Custom Drywall Profile

First off, let’s get one thing straight: custom drywall profiles aren’t one-size-fits-all, so your prep work has to match the profile you’re using. Last month, a contractor hit me up saying his fancy curved corner profile kept pulling away, and when I asked what he did first, he admitted he just slapped it on over bare studs. Dude. No. Prep is 70% of the job, and cutting corners here is how you end up re-doing a corner when someone bumps it with a vacuum.
Let’s start with the very first step, no exceptions: drywall the adjacent sides first. Wait, right—corners are two drywall pieces meeting, right? You can’t install a custom profile if one side of the corner is a half-inch off from the other. For most corners (inside or outside), that means hanging your two drywall sheets, leaving a 1/8” gap between the edges where they meet—super important, that gap isn’t random. If you butt them tight, there’s no room for compound, and if you leave more than 1/8”, you’ll have to fill it with way too much mud, which shrinks and cracks. For profile-specific stuff, if you’re using a transition profile between a 90-degree outside corner and a curved bay, mark the profile’s guide line on both drywall sheets so the gap is even across the whole length—no lopsided gaps mid-corner.
Next, measure twice, cut once—but make your cuts for the profile, not just the drywall. Custom profiles come in standard 8, 10, 12-foot lengths, but most jobs need custom cuts, duh. Grab a sharp utility knife (fresh blade, no dull ones that skip) or a metal snips if it’s an aluminum or steel profile—don’t use a hacksaw, it leaves burrs that’ll scratch your drywall or your hands. For inside corners, the profile will have two flanges that sit flat against the drywall; when you cut the profile, make sure the length is exactly the height of the corner, minus 1/4” at the top where it meets the ceiling and minus 1/4” at the floor where it meets the baseboard. That tiny gap gives you room to adjust if the floor or ceiling is slightly out of level—most old houses aren’t perfectly square, so accounting for that saves you from forcing the profile and breaking it. For outside corners, same length rule, but here the profile has a sharp edge, so cut the flanges 1/16” shorter than the drywall edge? Wait, no—wait, let’s correct that: for outside corners, the flanges should sit flush with the drywall face, so if your drywall is 1/2” thick, don’t cut the flanges shorter. The only cuts you make are to the length, and maybe a notch if you’re around an outlet box? Oh right, around electrical boxes, plumbing penetrations, any protrusions in the corner—mark the spot on the profile, cut a clean notch with snips, sand the edges smooth, no sharp bits that’ll tear mud later.
Now, the big one: how to attach the profile so it doesn’t move while you mud. I see so many people use just drywall screws, but for custom profiles, especially thicker steel or decorative ones, screws alone won’t hold if you don’t hit the studs. Wait, here’s a rule I swear by: for any custom profile, you need fasteners every 12 inches along the flanges, and within 2 inches of every corner bend, cutout, or end. But don’t just drive screws into the face of the flange—if you do that, you’ll see tiny screw heads peeking through the mud, which is a nightmare to sand out. Instead, countersink the screws just enough so the head is below the profile’s surface, not poking into the drywall. For metal profiles, pre-drill the screw holes first—no exceptions, drilling into thin metal without pre-drilling will crack the flange, and that’s a waste of a custom cut. For vinyl custom profiles? Even easier—self-tapping screws work, and they’re softer, so you don’t have to pre-drill, but still go slow so you don’t strip the hole.
Wait, and for inside corners specifically—do not attach both sides at once. I made that mistake on my first big custom job, and I had a bumpy corner that took three days to fix. Here’s the trick for inside corners: attach one flange first (usually the one that’s more level, so less adjusting) with the fasteners, then hold the other flange up against the opposite drywall side, make sure the profile is straight along the entire corner (use a 4-foot level, not a tiny torpedo level—small levels miss big warps in walls), then attach the second flange. That way, you don’t stretch or twist the profile, which causes gaps between the flange and drywall that mud will fill poorly, leading to cracks later. For rounded custom bullnose inside corners, that same rule applies, plus you can use a small clamp every 18 inches to hold the flange tight to the drywall while you attach screws—clamps are cheap, and they eliminate gaps you’d miss with just your hands.
Now, the part that makes or breaks the finish: the joint compound step. A lot of guys use regular all-purpose joint compound here, but for custom profiles, you want a light-weight topping compound. Why? All-purpose is too heavy, shrinks a lot, and can pull the profile off if you apply too thick a coat. Topping compound is smoother, sets slower (so you have time to work it into the corner), and shrinks way less. Let’s break this down: first coat, the “bedding coat.” Mix the topping compound to a peanut butter consistency—not too runny, not too thick. Spread a thin, even layer over both flanges of the profile, making sure you work it all the way into the gap between the flange and the drywall, but don’t glob it on (you’ll have to sand forever later). Wait, no—for outside corners, especially custom ones with a reveal, you don’t want compound on the sharp edge, right? That’s the point of the reveal. So for outside profiles, apply compound only to the flanges, keep the edge clean. For inside corners, you can feather a tiny bit onto the adjacent drywall (about 1/2 inch) to blend, but not too much.
Let that first coat dry completely—24 hours, minimum, even if the bag says it dries in 2. I’ve had too many corners crack because someone skipped the full dry time. Next, the second coat, the “fill coat.” Mix the topping compound a little thinner this time, like heavy cream. Use a 6-inch drywall knife, and smooth over the first coat, feathering out to about 2 inches on each drywall side. For inside corners, don’t force the compound into the corner—let the knife glide along the profile’s edge, so you don’t build up too much mud in the middle. For outside corners, run the knife along the sharp edge lightly, so you don’t round it over (that’s how you lose your custom reveal). Wait, and if you see any gaps between the flange and drywall after the first coat, this is where you fill them—use a small 3-inch knife to dab compound into the gap, don’t just spread it on the surface.
Third coat, the finish coat. This is the one that makes the corner look seamless. Mix the compound to a paint-like consistency. Use a 10-inch knife to feather the edges out to 3 inches on each side, so the transition from mud to drywall is invisible. For custom profiles, if they’re textured, you can add texture to the finish coat to match the wall—use a texture spray or a sponge, whatever matches your room, so the profile blends in instead of standing out like a sore thumb.
Wait, let’s talk about common mistakes I see all the time, because avoiding these will save you so much hassle. First: not accounting for wall/ceiling bow. Old homes? Walls warp, ceilings aren’t level. If you just push the profile straight along a bowed wall, you’ll have gaps in the middle, no matter how much mud you put. The fix is simple: before attaching the profile, lay it along the corner, and mark where the wall is off, then bend the profile slightly to match—most custom metal profiles have enough give to adjust 1/8 inch without breaking. Don’t force it, though—if it won’t bend, the bow is too big, and you’ll need to notch the flange slightly so it sits flat. Second: using the wrong screws. I can’t tell you how many times a contractor brings me a profile with screw heads protruding or flanges cracked because he used drywall screws that are too long. For aluminum profiles, use 1-inch bugle-head screws; for steel, 1 1/4-inch; for vinyl, 1-inch self-tapping. Length matters—too short, and it doesn’t hit the stud; too long, and it pokes through the flange. Third: rushing the compound dry time. I’ve seen guys do three coats in one day, and within a week, the corner is cracking. Humidity makes it worse, too—if it’s a rainy day, add an extra 12 hours between coats. It’s not worth the risk.
What about specific types of custom corners? Let’s say you’re doing a radius corner, like in a home office or a dining room. Those custom curved profiles are great, but you can’t bend a straight profile to make a radius—you have to use a pre-formed curved custom profile, cut to length, of course. Prep is key here: for a radius inside corner, the drywall ends will be curved, so use a router or a curved drywall knife to cut the edge smoothly, no jagged cuts that will show through the mud. Attaching curved profiles is similar: use clamps every foot to hold the curve tight to the drywall while you screw, so you don’t get flat spots. For that radius outside corner, same thing—clamps, and when you mud, use a flexible knife to follow the curve, so you don’t have a sharp edge on the rounded part.
Wait, another quick tip: if you’re working alone, it’s easy to hold the profile with one hand and attach screws with the other, but get a helper for the first coat of mud? No, actually, use a screw gun with a clutch set to the right depth—stop guessing, the clutch will drive the screw exactly where it needs to be, no over-driving that cracks the flange. I keep my screw gun’s clutch at 8 for aluminum, 10 for steel, and it’s never let me down.
Now, let’s wrap this up with what matters: if you take your time, prep properly, follow the steps, your custom corner will look like it was done by a pro, not someone who just grabbed a random profile from the store. But here’s the thing—this is the base, but custom profiles have unique specs, right? Maybe your profile has a recessed channel for LED lighting, or a 2-inch reveal that needs extra attention, or it’s made for moisture in a bathroom or basement. We make all kinds of Special Custom Drywall Profiles, so if you’ve got a specific corner project that’s not covered here, just reach out—we can send you a custom installation guide matched exactly to your profile, no extra charge, no sales pitch (well, maybe a little, but mostly we just want to make sure your job looks good). If you’re ordering multiple profiles, we’ll even send a free sample so you can test the cut and attach method before you do the whole job, so you don’t waste materials on a bad fit.
Don’t let custom corners stress you out. Most of the mistakes I see are from people overcomplicating it, or not taking the time to prep and dry the compound properly. Take it step by step, double-check every measurement, and remember that custom profiles are supposed to make your space look better, not harder to work with.
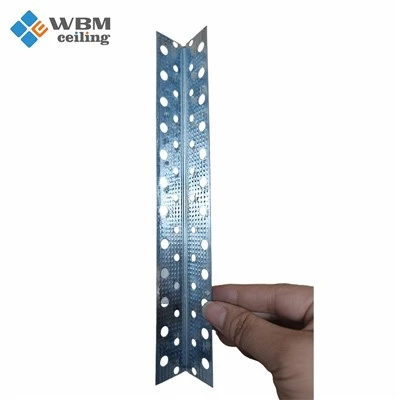
Got a tricky custom corner job? Need a custom profile cut to your exact specs? Hit us up—we’re here to help you get that perfect corner.
C Type Ceiling Furring Channel References:
- Drywall Installation Guide, Gypsum Association, 2021.
- Specialty Metal Drywall Profiles: Best Practices for Installation, Metal Lathing and Steel Framing Association, 2020.
- Residential Custom Drywall Finishing Standards, National Association of the Remodeling Industry, 2022.
Langfang Weikaihua Building Material Co., Ltd.
Langfang Weikaihua Building Material Co., Ltd. is one of the most professional special custom drywall profile manufacturers and suppliers in China, featured by quality products and low price. Please rest assured to buy discount special custom drywall profile from our factory. Contact us for customized service and free sample.
Address: Peng Er Wan Villiage, Zhao Ge Zhuang Town, Wen’an County, Langfang City, Hebei Province, China
E-mail: joyce@wbm.cc
WebSite: https://www.wbmceiling.com/
